vol. 01·section B // №01 of 07·friday, jan 30, 2026
azpim: A CLI for Azure Privileged Identity Management
Manage Azure PIM roles from your terminal. Learn how to install azpim, activate/deactivate roles, create presets, and automate PIM workflows.
- filed
- jan 30, 2026
- read
- ~7 min
- length
- 1,398 words

Introduction
If you work with Azure PIM, you know the routine: Portal → PIM → My Roles → Find Subscription → Activate → Type Justification → Wait.
Every. Single. Day.
I tracked my PIM activations for a week: 31 activations × ~45 seconds = 23 minutes of clicking. That’s when I decided to build azpim — a CLI that brings PIM to your terminal.
# Before: 5 portal clicks, 45 seconds
# After: One command, 5 seconds
azpim activate --preset morning-setup
Same security model. Same audit trail. Just without the Portal Dance™️.
Why azpim?
Here’s what every Azure user deals with:
- Data Engineers: Need 5+ roles just to check ADF pipelines (Data Factory, Storage, Databricks, Key Vault, Log Analytics)
- Developers: Local apps using managed identity still need PIM roles activated to run
npm run dev - DevOps: Debugging across environments means activating roles in dev, staging, AND prod
- Everyone: Types “Daily development work” as justification 500 times a year
PIM is great for security. The portal experience? Not so much.
Prerequisites
Before we dive in, make sure you have:
- Node.js 18+ — The runtime that powers azpim
- Azure CLI — You’ll need to be logged in (
az login) - Eligible PIM roles — The tool can only activate roles you’re eligible for (no magic here, sorry!)
Installation
Getting started is as simple as:
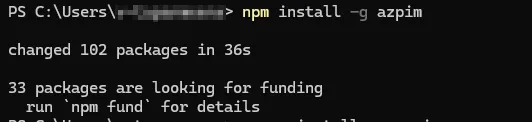
# npm
npm install -g azpim

# pnpm (if you're cool like that)
pnpm add -g azpim

# yarn
yarn global add azpim
Verify it’s installed:
azpim --versionThat’s it. No Azure app registrations. No service principals. No config files. Just install and go.
Getting Started
The simplest way to use azpim is just to run it:
azpimThis launches interactive mode — a friendly menu that guides you through the process.
azpimYou’ll be presented with an interactive menu to select roles and provide justification.

Core Commands
Activate Roles
Activate one or more eligible PIM roles:
# Interactive mode
azpim activate

# Short alias
azpim a
Flags for non-interactive mode:
| Flag | Alias | Description |
|---|---|---|
--role <name> | -r | Role name to activate |
--scope <scope> | -s | Resource scope (subscription/resource group) |
--reason <text> | -j | Justification reason |
--duration <hours> | -d | Activation duration |
--dry-run | Preview without activating |
Example:
azpim activate --role "Contributor" --scope "/subscriptions/xxx" --reason "Deploy hotfix" --duration 4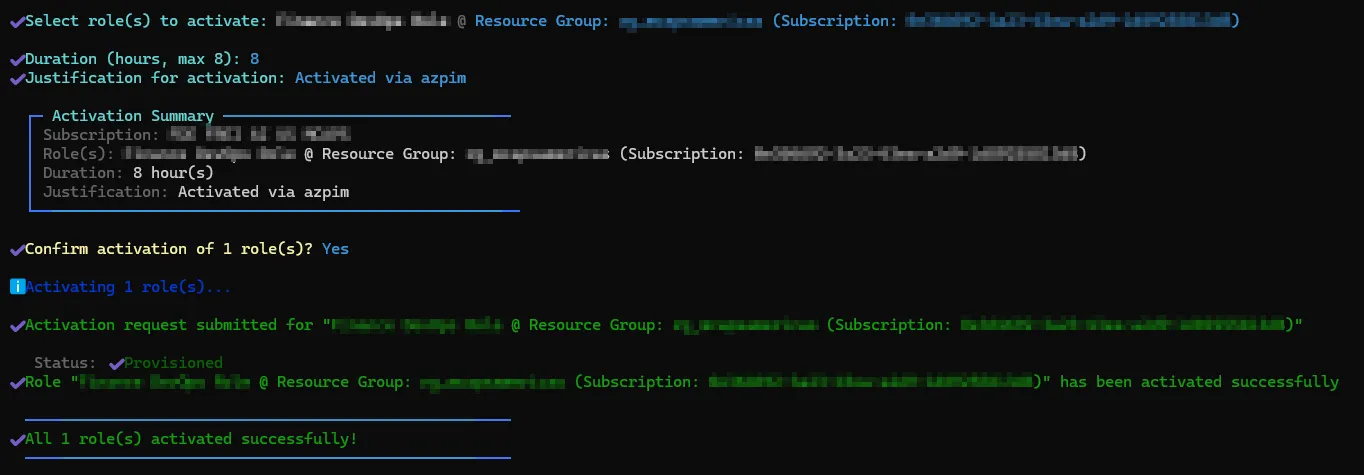
Deactivate Roles
Deactivate active PIM roles when you’re done:
# Interactive mode
azpim deactivate

# Short alias
azpim d
Check for Updates
Check if a newer version is available:
azpim update
# or
azpim upgrade
Presets System
Here’s where azpim gets really powerful. You know how you activate the same combination of roles every day? Same subscriptions, same justification, same duration?
Presets let you save those configurations and reuse them with a single command. It’s like browser bookmarks, but for PIM activations.
List Presets
azpim preset list
Add a Preset
azpim preset addYou’ll be prompted to:
- Name the preset
- Select roles to include
- Set default justification
- Configure duration

Template Variables
Tired of writing the same justification? Use template variables to auto-fill dynamic values:
| Variable | Description |
|---|---|
${today} | Current date (YYYY-MM-DD) |
${userPrincipalName} | Your Azure AD UPN |
${time} | Current time |
Example justification template:
Daily development work - ${today} - ${userPrincipalName}Other Preset Commands
# Show preset details
azpim preset show <name>

# Edit existing preset
azpim preset edit <name>

# Remove a preset
azpim preset remove <name>
Automation & CI/CD
This is where things get interesting. What if your deployment pipeline could activate its own PIM roles before deploying? No more “oops, forgot to activate” failures.
azpim supports non-interactive mode for exactly this.
Non-Interactive Activation
azpim activate \
  --role "Contributor" \
  --scope "/subscriptions/12345678-..." \
  --reason "Automated deployment" \
  --duration 2 \
  --yes  # Skip confirmation prompts
JSON Output
Get machine-readable output for integration with other tools:
azpim activate --json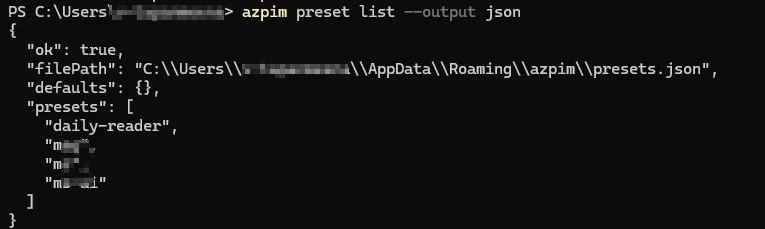
Dry Run
Preview what would happen without making changes:
azpim activate --role "Owner" --dry-runExample: CI/CD Pipeline
# Azure DevOps pipeline example
steps:
  - script: |
      npm install -g azpim
      azpim activate --role "Contributor" --reason "Pipeline deployment" --yes
    displayName: "Activate PIM Role"
    env:
      AZURE_CLIENT_ID: $(servicePrincipalId)
      AZURE_TENANT_ID: $(tenantId)
Technical Deep Dive
Architecture
┌──────────────────┐     ┌────────────────────┐     ┌─────────────────┐
│   CLI Layer      │────▶│   Azure Auth       │────▶│  Azure PIM API  │
│   (Commander.js) │     │   (@azure/identity)│     │   (REST/Graph)  │
└──────────────────┘     └────────────────────┘     └─────────────────┘
        │
        ▼
┌──────────────────┐
│   UI Layer       │
│   (Inquirer.js,  │
│    Ora, Chalk)   │
└──────────────────┘
Tech Stack
| Component | Technology | Purpose |
|---|---|---|
| CLI Framework | Commander.js | Command parsing, flags, help generation |
| Interactive Prompts | Inquirer.js | Checkbox, input, and list prompts |
| Spinners | Ora | Loading indicators during API calls |
| Styling | Chalk | Colored terminal output |
| Azure Auth | @azure/identity | Azure AD authentication |
| PIM API | @azure/arm-authorization | Role eligibility and activation |
| Language | TypeScript | Type safety and better DX |
Configuration
azpim stores configuration in platform-specific locations:
| OS | Config Path |
|---|---|
| Windows | %APPDATA%\azpim\config.json |
| macOS | ~/Library/Application Support/azpim/config.json |
| Linux | ~/.config/azpim/config.json |
Troubleshooting
”No eligible roles found”
Cause: Your account doesn’t have any PIM-eligible roles, or you’re not logged in.
Solution:
# Re-authenticate with Azure CLI
az login

# Check your eligible roles in Azure Portal
“Token expired” errors
Cause: Azure CLI token has expired.
Solution:
az login --scope https://management.azure.com/.default“Permission denied” on install
Cause: Global npm install requires elevated permissions.
Solution:
# Use sudo on Linux/macOS
sudo npm install -g azpim

# Or configure npm to use a different directory
npm config set prefix ~/.npm-global
What I Learned
Building azpim was a fun side project that scratched my own itch. Here’s what I took away from it:
-
Azure PIM API is… interesting — The difference between
roleEligibilityScheduleRequestsandroleAssignmentScheduleRequeststook me way too long to figure out. Documentation could be better, Microsoft. 👀 -
CLI UX matters more than you think — Adding spinners, colors, and clear error messages made a huge difference. Nobody wants to stare at a blank terminal wondering if something is happening.
-
Publishing to npm is easier than I thought — Once you get the package.json right, it’s just
npm publish. The hard part is choosing a name that isn’t taken. -
TypeScript saved me multiple times — Catching API contract issues at compile time instead of runtime? Yes please.
Try It Out
If you’re tired of the Azure Portal PIM dance, give azpim a try. It’s free, open source, and might just save you a few minutes (and a lot of frustration) every day.
npm install -g azpimGot questions, ideas, or just want to say hi? Open an issue on GitHub or reach out — I’d love to hear how you’re using azpim!